Work has been progressing recently on the Wombat flight computer. While the original designs had been started well back in October, a few weeks ago we restarted the schematics with a view to a much more capable payload.

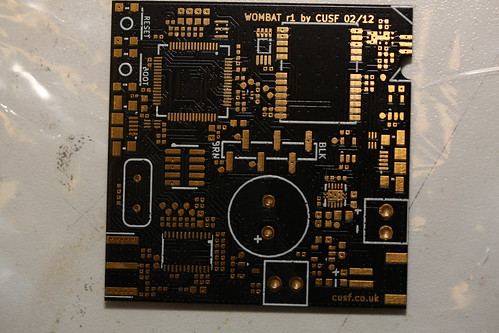
The schematics started coming together on the 18th Feb, and within a week were all finished and board layout began. A hectic weekend of designing part footprints and routing them together (all ~400 nets!) later, the designs for revision 1 were finalised at around 4.30AM Monday morning:
 We sent the design files off to Cambridge Circuit Company who kindly agreed to sponsor the PCBs and promised to do their best to get them made as soon as possible. We also had some solder stencils made up and placed an order for all the parts from Farnell, fingers crossed that everything would arrive in time for an early launch.
Fast forward to Tuesday and seven parcels have turned up in the post and we’ve collected the PCBs, which are looking amazing:
We wasted no time getting them soldered up and spent the rest of Tuesday evening, night and early Wednesday soldering, reworking and debugging our way through a number of small issues.
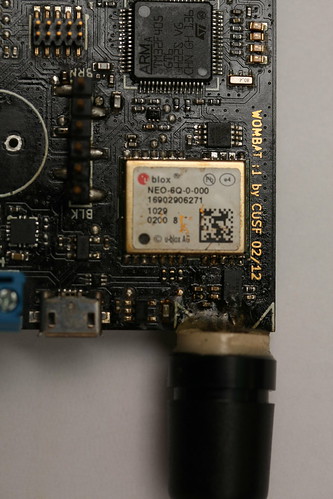
Perseverance prevailed and all the various subsystems started to work. The GPS was first, and thanks to the onboard USB we could test it right away. The STM32 (the microcontroller) had a few very tiny solder bridges thanks to our less-than-ideal paste application, but a bit of rework had this chip up and running, even if it wasn’t quite running code just yet.
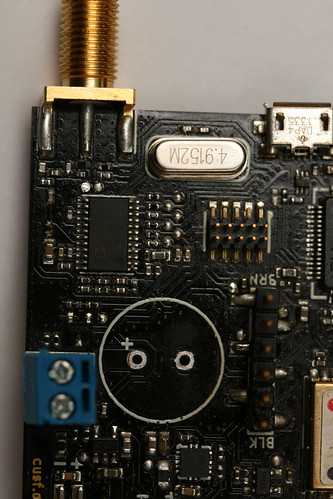
Debugging the power supply took several more days as various issues were worked through, but eventually we realised the current limiting supply was causing it to lock in to undesirable state, which combined with a too-low-current inductor was causing all our problems. A quick part swap out later and the power supply was working fine.

Meanwhile, the STM32 was hitting a hard fault every time it tried to start up. It turns out this was due to the linker script being told about 192K RAM, but actually the RAM isn’t continuous in address — 16K of it is off at 0x10000000, so the startup code was trying to load the stack pointer with an invalid address, causing the hardfault. Once we’d resolved this, code started loading and we could move on to the radio.

Further fun was had getting the radio to start up — the PLL was not locking on to the correct frequency, despite coming very close. Significant pain later, it turns out the loop filter was not quite right for 434MHz operation — it could very happily lock at 400MHz all the way up to 433.5MHz, but no higher. Happily, 433MHz is still inside the ISM band, so we’re set on that front for now (pending a redesign of the loop filter — which happily just means swapping around some components).
Now that all the hardware’s working, it’s time to get started on the software required for it to act as a basic flight computer, in advance of a potential launch this coming Sunday (weather permitting, of course!).